In a recent Totally unscripted broadcast, Steve Webster provided a great introduction to monetizing add-ons, along with some sample code on how to use Stripe to manage payments. Using stripe means that you have to deal with things happening both server and client side, as well as with the Stripe API. This means that there’s a fair bit of async activities going on, and if you read the content on this site at all you’ll notice that I prefer to use Promises to orchestrate all that. In this post I’ll show a way of implementing Stripe from Apps Script using promises.
Using StripeCheckout.
Stripe have a simplified entry point to their API – StripeCheckout. You can include it in your project withhttps://checkout.stripe.com/checkout.js The steps involved in using StripeCheckout are as follows
- Configure. Here you set up things like the icon to use in the payment dialog, what to callback when the payment is complete, and when the payment is closed.
- Open. This kicks off the payment screen. Here you can set up the amount, and various behavior parameters.
I have a dedicated namespace for doing all my Stripe related stuff, but the method that configures and gets the payment is here./** * get the payment client side * @param {string} name 1st line on panel * @param {string} description 2nd line * @param {number} amount in cents to charge * @return {Promise} a promise to the result of the payment */ ns.getPayment = function (name, description , amount) { // this is a promise to the payment // store the resolution callbacks for later var resolvePayment, rejectPayment; var payment = new Promise (function (resolve , reject ) { resolvePayment = resolve; rejectPayment = reject; }); // configure returns an object // that will execute with the .open method try { StripeCheckout .configure ({ key:ns.settings.keys.key, image:ns.settings.image, token:function (tob) { // this is fired // when a payment is successfully made resolvePayment (tob); }, closed:function() { // this will be fired after the token resolution // so if the promise payload is null you'll know that // the payment was abandoned resolvePayment (null); } }) .open ({ name: name , description: description, amount: amount, currency: 'USD', panelLabel: "Pay {{amount}}", zipCode: false, allowRememberMe:false }); } catch (err) { rejectPayment (err); } return payment; }; Let’s walk through that a little.
getPayment returns a promise which is resolved when
- the token handler indicating that payment has been made is fired. In which case the promise delivers the token.
- the closed handler indicating that the payment form has been closed is fired. This resolution delivers null
The closed handler is fired after the token handler, so that way you can know if the resolved promise delivers null, then the payment form has been abandoned. This is what the payment form looks like  If the user successfully completes a payment, then this is fired.
 token:function (tob) { // this is fired // when a payment is successfully made resolvePayment (tob); },
Using getPayment.
I have a couple of different payment forms in the app from which this code is extracted, so I use this general function /** * configure and get a payment * @param {number} currentExpire timestamp that current subscription runs out * @param {string} type the type of subscription * @param {DomElement} button the button that initiated the payment form to come up * @param {object} plan the plan description -eg {name:'Gold',amount:500,description:'Dicers Gold'} * @return {Promise} to all this happenening */ function pay_ (currentExpire,type,button,plan) { // avoid double clicking button.disabled = true; // the callback when token is received return GasStripeCheckout.getPayment(type , plan.description, plan.amount) .then (function (result) { // if result is null, then the payment gas bveen abandoned if (result) { // do whatever is is required when payment is successful Process.control.registration.data.plan.expire = extendSubscription_ (currentExpire).getTime(); // update properties on the server // - only want to store minimal customer information, even though its not accesible to me anyway return Provoke.run ('Props', 'setPlan', { created:result.created, email:result.email, id:result.id, type:type, name:plan.name, expire:Process.control.registration.data.plan.expire }); } }) .then(function(data) { // this will be null if payment was abandoned if (data) { Process.control.registration.data = data; App.toast ('Thank you for your ' + type,
'
Payment reference is
‘ + data.plan.id + ‘
} showPlan_ (); }) ['catch'] (function (err) { // do whatever is is required when payment fails App.showNotification ("payment failed", err); }); } Let’s walkthroughThis is running from the client-side, but it obviously has to update properties using server-side functions to store the result of the payment.
- disable the button that kicked off the payment process to avoid double-clicking
- initiate the payment form
- when its resolved, it will be resolved either with some data – payment was made, or null – it was abandoned.
- use Provoke (see Using promises with apps script) to initiate a server-side store of data associated with the payment. Provoke is just a Promise based wrapper for google.script.run
- when that’s done, inform user all is well and update the status of the premium screen to reflect the new status
In other words, a successful payment replaces this 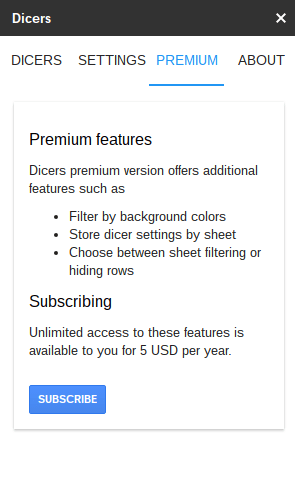 with this
and that’s all there is to it. Some of the functions here are of course specific to my app, so I won’t reproduce them here, but you should get the general picture.
For more on the dicers add-on – see Dicers
Subpages
- Chord Snip
- Color Arranger
- Debugging Office JavaScript API add-ins
- Dicers
- Dicers Pro and advanced features
- Measure round trip and execution time from add-ons
- Merging slide templates with tabular data
- Office Add-ins – first attempt
- Orchestrating competing google and Office framework loads
- Plotting maps with overlays Sheets add-on starter
- Repeatable add-on settings layouts and style
- Sheets API – Developer Metadata
- SlidesMerge add-on
- Unpicking the Google Picker
- Watching for changes in an Office add-in
- When test add-ons doesn’t work
- Polyfill for Apps Script properties service for the Office JavaScript API
- Sankey Snip