If you are writing webapps and accessing some of the Google JSON APIs services, you’re going to need to deal with oAuth2. I decided that I was fed up with it, and provide here a library that should help get it right first time. EzyOauth2 prefers you to store access and refresh tokens it obtains, probably in your propertiesService store. That way, it should only take you through the authorization dialogue once, since it automatically refreshes tokens when they expire. You’ll find example application patterns here.
In many cases, you can get an access token with ScriptApp.getOAuthToken(), and as long as you Script has the scopes you need to use already, then you don’t need to do any of this. But for many services that have not yet been enabled in Apps Script, you have to create your own authentication dialog. Here’s how.
Quickstart
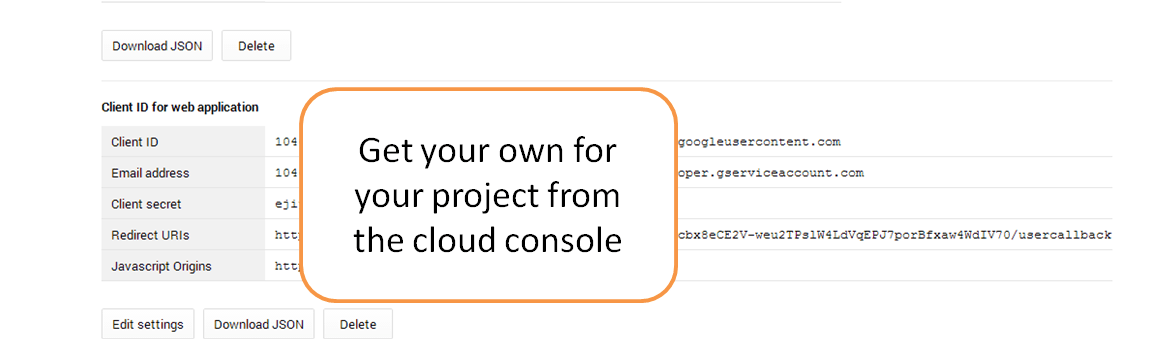
The cloud console.
I’m assuming that if you are here, you’ll know about the cloud console. First you need to go there and create a project, and some credentials.
Ignore the redirect URIs for now, we’ll fix that later.
Find out which scopes you’ll need for your project
I’m creating a project to access the cloud DataStore, so I need these scopes.
scopes : ['https://www.googleapis.com/auth/datastore','https://www.googleapis.com/auth/userinfo.email']
I find that the Oauth2 playground is the best place to find out what you need for each API
Create your webapp
Now create a new blank script.
We’re going to first of all store the credentials we just created in its script properties to keep them secret. Use the code below, substituting your credentials and scopes, then run initialStore(). You should use whichever property store is most appropriate. I’m using ScriptProperties, but UserProperties might be more appropriate, depending on your objectives, but that’s up to you.
var PROPERTY_KEY = "EzyOauth2Datastore";

function initialStore () {
  setAuthenticationPackage ( {
   clientId : "xxxxxxxx.apps.googleusercontent.com",
   clientSecret : "xxxxxxxxxxx",
   scopes : ['https://www.googleapis.com/auth/datastore','https://www.googleapis.com/auth/userinfo.email']
  });
}

function setAuthenticationPackage (package) {
  PropertiesService.getScriptProperties().setProperty(PROPERTY_KEY, JSON.stringify(package));
  }
You can check it worked by looking at your project properties. If it did you can delete all that again, since you now have your credentials safely stored.
Add the EzyOauth2 library.
add a reference to this library
MSaYlTXSVk7FAqpHNCcqBv6i_d-phDA33
Discover your redirectURI, and update the cloud console
In order that it can check that you are really you, accessing the service from where you intended, you have to enter a redirectURI into the cloud console. Copy in the code below – and publish your web app.
function doGet(e) {
  var eo = new cEzyOauth2.EzyOauth2 ({});
  return HtmlService.createHtmlOutput ( 'enter this as your redirect uri into the cloud console for this project ' + eo.showRedirect());
  }
You’ll get something like this, and you’ll copy the url into the redirect URIs section of the cloud console.
enter this as your redirect uri into the cloud console for this project https://script.google.com/a/macros/mcpher.com/s/AKfycbx8eCE2V-weu2TPslW4LdVqEPJ7porBfxaw4WdIV70/usercallback
Write your app
The model below shows how to write an app using EzyOauth2. This example is preparing for writing to the cloud DataStore. The first time you run it, it will take you through the regular oAuth2 dialog. Subsequently it will use refresh tokens to automatically update your access token. There’s really not much to it, and you probably don’t need to change it.
/**
 * get your authentication package from your property service
 * return {object} an authenticatin package that looks like the below and comes from the google cloud console for your projects
 *
 * clientId : "xxxxxxxx.apps.googleusercontent.com",
 * clientSecret : "xxxxxxxxxxx",
 * scopes : ['https://www.googleapis.com/auth/datastore','https://www.googleapis.com/auth/userinfo.email'] // example
 *
 */

var PROPERTY_KEY = "EzyOauth2Datastore";


function getAuthenticationPackage () {
  var p = PropertiesService.getScriptProperties().getProperty(PROPERTY_KEY);
  return p ? JSON.parse(p) : {};
}

/**
 * set your authentication package back to your property service
 * this will make the access token and refresh token available next time it runs
 */

function setAuthenticationPackage (package) {
  PropertiesService.getScriptProperties().setProperty(PROPERTY_KEY, JSON.stringify(package));
}

// this is your web app

function doGet (e) {

  // set up authentication
  var authenticationPackage = getAuthenticationPackage();
  var eo = new cEzyOauth2.EzyOauth2 ( authenticationPackage, "getAccessTokenCallback" );


  // eo will have checked for an unexpired access code, or got a new one with a refresh code if it was possible, and we'll already have it
  if (eo.isOk()) {

    // should save the updated properties for next time
    setAuthenticationPackage(authenticationPackage);
    // good to do whatever we're here to do
    return doSomething (eo.getAccessToken());
  }

  else {

    // start off the oauth2 dance - you'll want to pretty this up probably
      return HtmlService.createHtmlOutput ( 'Authenticate to datastore ');
  }
}

/**
 * this will be the first call back, you now need to get the access token
 * @param {object} e arguments as setup by the statetokenbuilder
 * @return {void}
 */

function getAccessTokenCallback(e) {

  // this will fetch the access token
    var authenticationPackage = getAuthenticationPackage();
    var eo = new cEzyOauth2.EzyOauth2 (authenticationPackage).fetchAccessToken(e);

    if (!eo.isOk()) {
      throw ('failed to get access token:'+eo.getAccessTokenResult().getContentText());
    }
    else {
    // all is good we can go ahead and do something

     // should save the updated properties for next time
      setAuthenticationPackage(authenticationPackage);
      return doSomething (eo.getAccessToken());
    }

}

// this is your processing - all is now normal
function doSomething (accessToken) {

   var options = {
     method: "POST",
     headers: {
       authorization: "Bearer " + accessToken
     }
   };

  var result = UrlFetchApp.fetch("https://www.googleapis.com/datastore/v1beta2/datasets/xliberationdatastore/lookup", options);

  return HtmlService.createHtmlOutput ('it worked' + result.getContentText());

}
Walkthrough
When your web app is kicked off it will run doGet(). The only things you might need to change here is
doSomething (eo.getAccessToken());
The doSomething() function is the one that is eventually called when an access token is obtained. It will get called from here if there is no authorization dialog required – meaning that EzyOauth2 was able to get or refresh an access token without provoking dialogue. Your doSomething() function is the one that does the work of this webapp. It will be passed the access token.
If an authentication dialogue is required, this is how it is displayed to the user. You may want to pretty this up a bit.
return HtmlService.createHtmlOutput ( 'Authenticate to datastore ');Code for doGet()
function doGet (e) {

  // set up authentication
  var authenticationPackage = getAuthenticationPackage();
  var eo = new cEzyOauth2.EzyOauth2 ( authenticationPackage, "getAccessTokenCallback" );


  // eo will have checked for an unexpired access code, or got a new one with a refresh code if it was possible, and we'll already have it
  if (eo.isOk()) {

    // should save the updated properties for next time
    setAuthenticationPackage(authenticationPackage);
    // good to do whatever we're here to do
    doSomething (eo.getAccessToken());
  }

  else {

    // start off the oauth2 dance - you'll want to pretty this up probably

      return HtmlService.createHtmlOutput ( 'Authenticate to datastore ');
    }

  }
  }
Callback
This function gets called after the user consent dialog, if one was needed. You probably don’t need to change any of this.
function getAccessTokenCallback(e) {

  // this will fetch the access token
    var authenticationPackage = getAuthenticationPackage();
    var eo = new cEzyOauth2.EzyOauth2 (authenticationPackage).fetchAccessToken(e);

    if (!eo.isOk()) {
      throw ('failed to get access token:'+eo.getAccessTokenResult().getContentText());
    }
    else {
    // all is good we can go ahead and do something

     // should save the updated properties for next time
      setAuthenticationPackage(authenticationPackage);
      return doSomething (eo.getAccessToken());
    }

}
doSomething
this is where you start your work. The access code will be passed to it. In this case, I’m doing a cloud datastore lookup
// this is your processing - all is now normal
function doSomething (accessToken) {

   var options = {
     method: "POST",
     headers: {
       authorization: "Bearer " + accessToken
     }
   };

  var result = UrlFetchApp.fetch("https://www.googleapis.com/datastore/v1beta2/datasets/xliberationdatastore/lookup", options);

  return HtmlService.createHtmlOutput ('it worked' + result.getContentText());

}
Some examples using ezyoauth2
- oAuth2 authentication for shoeboxd
- Oauth2 authentication for reddit
- Oauth2 authentication for Asana
- Multiple oAuth2 authentication packages
- Oauth2 authentication for podio
- Step by Step – Apps Script Oauth2 authentication with Github
- Oauth2 step by step – apps script authentication for the Drive JSON API
- Using the gplus api in Apps Script
- Datastore driver
- Cloud print connector for Google Apps Script
- Using Drive SDK from Google Apps Script
- Oauth2 authentication for Microsoft OneDrive
The library code
here is the code for the EzyOauth2 library. You can include it in your project by referencing MSaYlTXSVk7FAqpHNCcqBv6i_d-phDA33, or fork it by copying https://script.google.com/d/1lW9pn80yQH1hbbKsZDJiZTtvioJw8MWppFj8G3FBz7BegvhOSSI6pNYf/edit?usp=sharing