GasGit
Getting your scripts to Github is not the easiest thing in world. Nowadays people mainly do it manually, which is fine for small scripts, but when you have many with lots of library dependencies, it can be a nightmare to keep up to date.
In Using Drive SDK I described why you might want to use the SDK JSON API rather than the built in Apps Script Drive Class. We’ll us that, along with the Github API. Don’t forget you’ll need Oauth2 for drive set up as described in Oauth2 step by step – apps script authentication for the Drive JSON API and you’ll also need it for GitHub as described in Step by Step – Apps Script Oauth2 authentication with Github. For how to do this with VBA, see Integrate VBA with GithubNote: There have been some changes to this as of Nov 2018 – namely
- The dependency service hack that was used to discover which libraries and advanced services a script was using doesn’t work any more duw to some changes in Apps Script. However, this info can now be discovered using the Apps Script API.
- The Apps Script API is also used (as opposed to the Drive API) to get the source code out of scripts.
- The main scripts are moved to the top level repository (as opposed to being in the script folder) to make them compatible with clasp.
- appsscript.json manifest file is included in the generated repo.
- All these changes make GasGit a pretty good way to slowly migrate to clasp, the new way to develop with Apps Script.
- You can use Goa to manage your apps script token, but the manifest file allows you to do that using the Apps Script token. You’ll still need goa for Github Oauth.
These are explained in this more recent post.
What does GasGit do
Gets a group of apps script projects and their library dependencies to GitHub with the GitHub API, using Drive as a local repository. A selection of my Apps Script projects (including this one), can be found on my github account, and have been put there using GasGit in just a few minutes.
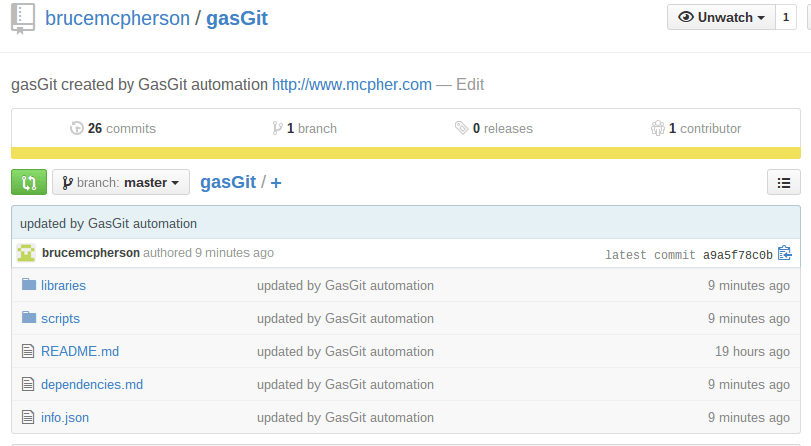
What’s in the repo
Here’s what this repo looks like when automatically created and committed. You can find the repository for GasGit here.
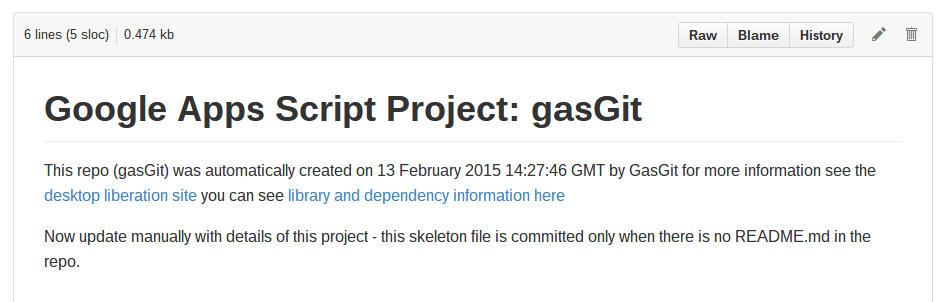
The readme file
This is committed if there isn’t one in the repo, otherwise it leaves it alone. The idea is that you use the initial skeleton to build on. If you want the skeleton re-instated, just delete your readme from the repo. It doesn’t say much and looks like this. This is created in the doLibraries() stage and committed to guthub in the doGit() stage if there’s not already a README in the repository.
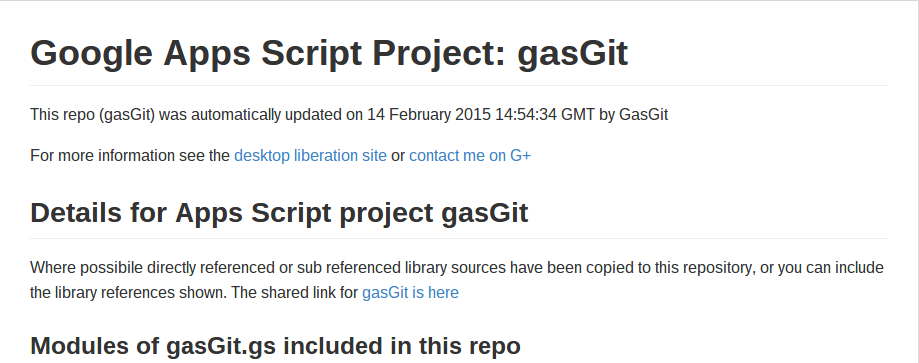
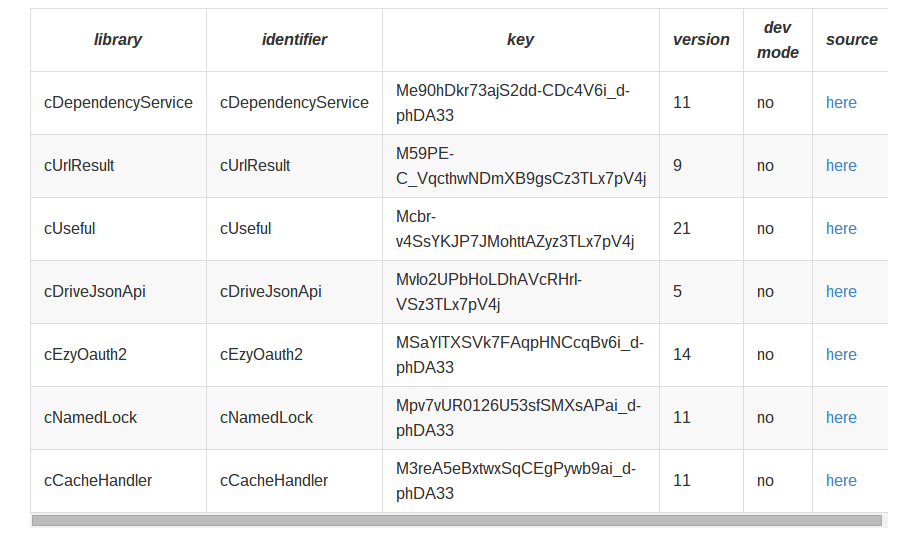
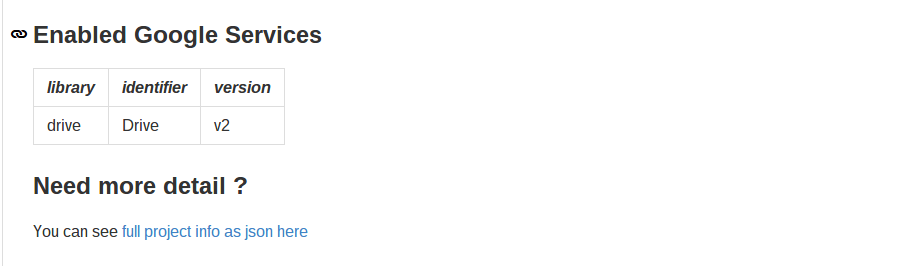
The dependency report
This describes what’s in the repo, and gives you all you need to be able to clone the project. All the libraries and library dependencies are shown along with their key. If the source of the library is available ( you own it and you committed it with GasGit as part of the same scope as the project), it will also be here. From this data you can decide whether to use the libraries or clone. This is created/modified in the doLibraries() stage and committed to guthub in the doGit() stage

The info.json
This is used to create all the documentation above, and to control execution of GasGit. It is updated at each stage and committed to guthub in the doGit() stage. Note that the info.json file will always be slightly different to the one on github, since it records when it was committed after the commit completed. Take a look directly on github, it’s a little big to reproduce below.
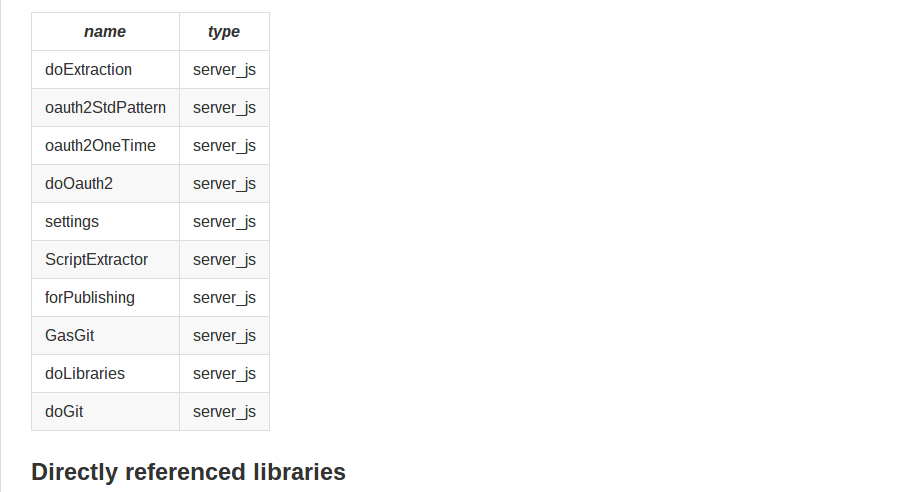
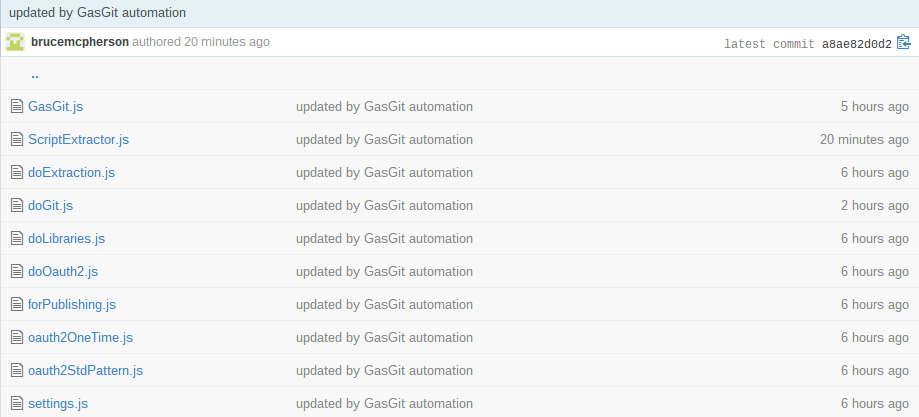
The scripts folder
This is the source for all your scripts in your project and looks like this (see previous note – these files are now at the top level.
The libraries folder
If available then all the sources for each dependency needed by this project and its libraries.
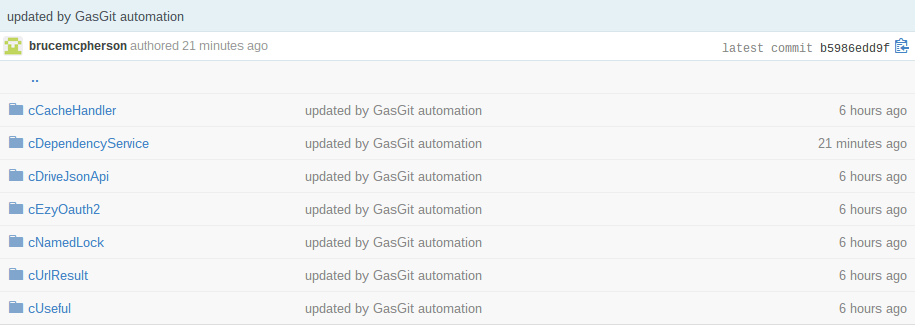
Each folder name matches a library, and contains the source for that library. Note that every library that is referenced for which sources are available are committed here – including libraries that are referenced by other libraries and so on. This list matched the dependency list in the dependencies.md report.
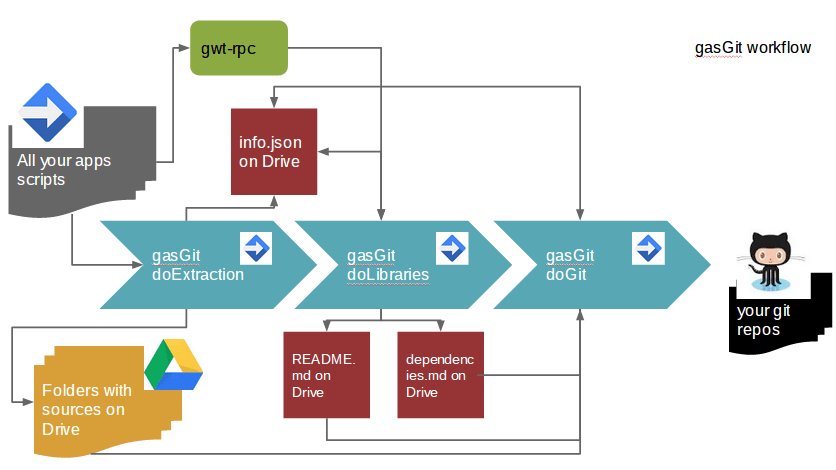
The Workflow
Here’s the workflow (once you’ve done the one off setup work for oauth2 and tweaked the settings for your drive folder layout). Since all this happens on Drive, it’s client independent – you can run it on a Mac, Linux , Windows a Chromebook (even a mobile device i suppose), and you don’t even need to have git installed since it uses the github API and operates directly on Drive files.
Step 0 – setup
- You’ll need to organize your scripts into one or more folder trees on drive. All scripts in the specified trees will be processed.
- As previously mentioned you’ll need to follow Step by Step – Apps Script Oauth2 authentication with Github and Oauth2 step by step – apps script authentication for the Drive JSON API to set up your set and forget oauth2 environment. As mentioned in the previous note, you can now manage Drive by updating the appsscript.json manifest file to look like this, and enabling the Apps Script API in the cloud console.
{
"timeZone": "Europe/London",
"dependencies": {
"enabledAdvancedServices": [{
"userSymbol": "Drive",
"serviceId": "drive",
"version": "v2"
}],
"libraries": [{
"userSymbol": "cUseful",
"libraryId": "1EbLSESpiGkI3PYmJqWh3-rmLkYKAtCNPi1L2YCtMgo2Ut8xMThfJ41Ex",
"version": "102"
}, {
"userSymbol": "cGoa",
"libraryId": "1v_l4xN3ICa0lAW315NQEzAHPSoNiFdWHsMEwj2qA5t9cgZ5VWci2Qxv2",
"version": "30"
}, {
"userSymbol": "cScriptApi",
"libraryId": "1TvPB6nhP1WyXWpbZtsj4T5cqb_RXmzkLh01IqFeDCAhrDul-FlB_be7o",
"version": "1"
}, {
"userSymbol": "cDriveJsonApi",
"libraryId": "1P0ZbhWVxXcYU8kJxtpdzm_tNuoBa34NLAubBUgEqsW7-pvEg5NVppTyx",
"version": "14"
}, {
"userSymbol": "cUrlResult",
"libraryId": "1NtAiJulZM4DssyN0HcK2XXTnykN_Ir2ee2pXV-CT367nKbdbTvRX4pTM",
"version": "18"
}]
},
"webapp": {
"access": "MYSELF",
"executeAs": "USER_DEPLOYING"
},
"exceptionLogging": "STACKDRIVER",
"oauthScopes": ["https://www.googleapis.com/auth/script.external_request", "https://www.googleapis.com/auth/script.projects", "https://www.googleapis.com/auth/drive"]
}
- Update with your settings to described your environment – reveal settings code below (for how to do this on your site see Dynamic height github gadget for Google Site)
Step 1 – doExtraction()
- Recursively reads all the projects in a given set of Drive folders and subfolders to create a set of projects in scope.
- Writes the source code for each script and html file in each project to a drive folder (one per project) local repo.
- Creates an info.json file for each project describing what it found.
- Source code is only updated if there’s been project changes detected since the last run, and you can run this as often as you like.
Step 2 – doLibraries()
- Reads all the info.json files created at step 1 for each project in scope
- Uses some hackery to figure out all the library dependencies for each project (see Making sense of gwt rpc dependency service)
- Creates readme.md and dependency.md files for automatic github documentation
- Updates the info.json files with all this new stuff
- Can be run as often as you like. Should be run in one instance since it needs to look at all the projects as a whole to figure out the interactions between them, and obviously depends on the scope projects created in Step 1.
Step 3 – doGit()
- Commits each project to gitHub, creating repos where necessary, consisting of:
- A standard readme.md file if one is not already there
- A dependencies.md file describing the Google services, libraries and sub libraries used by each project
- All the scripts from the main project
- If the source is available (part of the step 1 scope), all the scripts for all the libraries and sublibraries, creating git folders for each as required
- Can be run whenever you want. Only changes will be shown in the github project (note this is all limited to the main branch for now). All changes for all projects in scope will be committed at once. Only one instance should be run at once. It doesn’t take that long after the initial commit.
- Commits are only attempted if changes have been detected since the last commit.
Libraries
Using this approach, users of your repository can choose to use the provided library keys, or to use the cloned library source that is kept refreshed in the repository.
Note that library versions in use for a particular project are noted in the dependencies.md documentation, but the library source is always the latest.
You can find the repository for GasGit here. I’ll be adding to the technical writeup over time. For now it’s a little thin.
For more on drive SDK see Using Drive SDK